Auto-Uploads Results (Old Setup)
This guide steps through how to replace the current ‘assayexport.fmp12’ database with a custom list file after recent security changes to KAMAR that stopped the kamarcustom account from working.
These new scripts handle both the export and the upload for the Results, ESOL, and Assessment Schedule exports from KAMAR.
Step 1: Upload the custom lists file
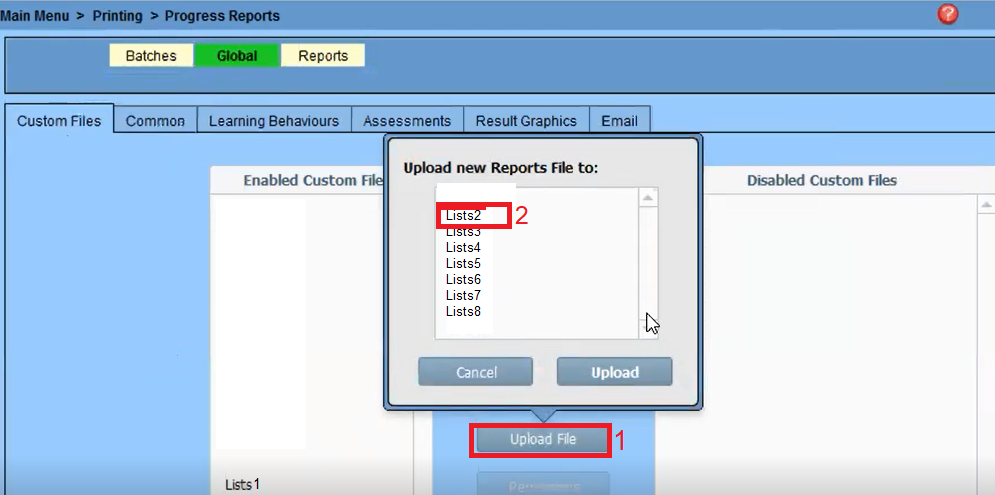
If custom lists file has already been uploaded, proceed to step 2. If not, on KAMAR go to Printing -> Progress Reports -> Global -> Custom Files. Click upload file and upload this file: Download k_Lists2.fmp12
Note: The list numbers vary from each school set-up. In the example below, it shows Lists2 (Custom Lists 2) is available > select Lists2 > Upload k_Lists2.fmp12
Step 2: Edit the Script
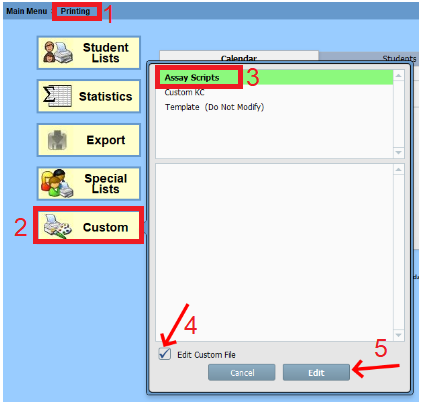
Then go to Printing -> Custom -> Assay Scripts and tick the “Edit Custom File” at the bottom of the popup.
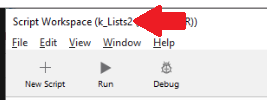
If no Assay Scripts, go to Printing>Progress Reports>Global>Custom Files>Select the Lists# (Custom list number where you uploaded the k_Lists file)>Open File>Scripts>Script Workspace>ServerScripts>Select “Assay_Core_Export”
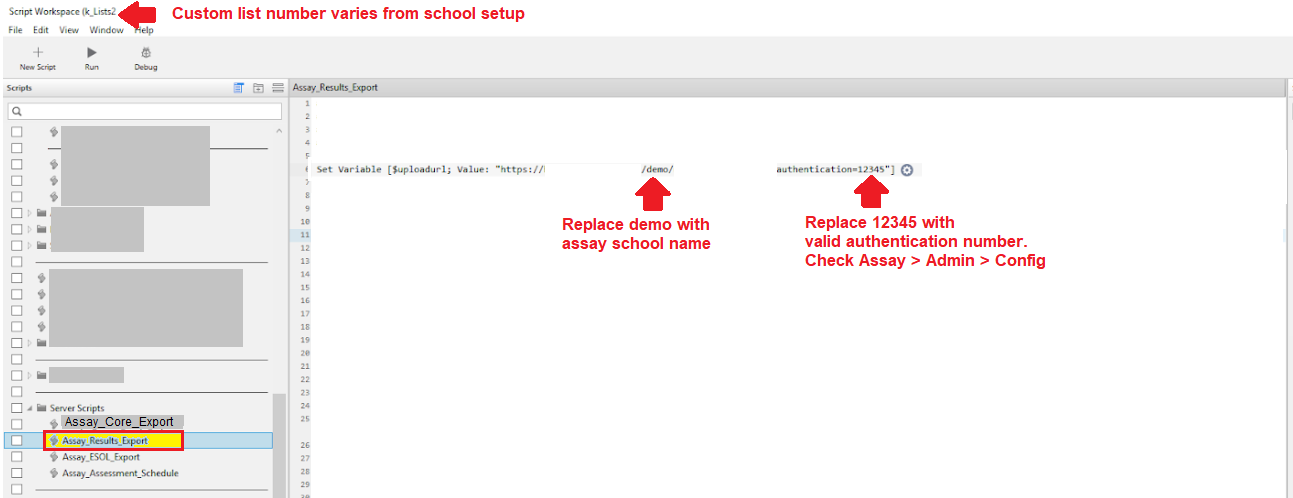
This will bring up the script workspace. On the left scroll down until you find the “Server Scripts” folder and open “Assay_Results_Export” by double-clicking on it. You need to edit line 6…
Step 3: Editing the other Scripts
If you use the ESOL or Assessment schedule exports these need to be edited in the same way as the result script (see step 2).
Step 4: Automating This Script
File Maker Server 17 Guide here
KAMAR has provided instructions on how to run these custom scripts here:
Below is an edited version of these instructions specifically for assay.
- Log onto the Admin Console.
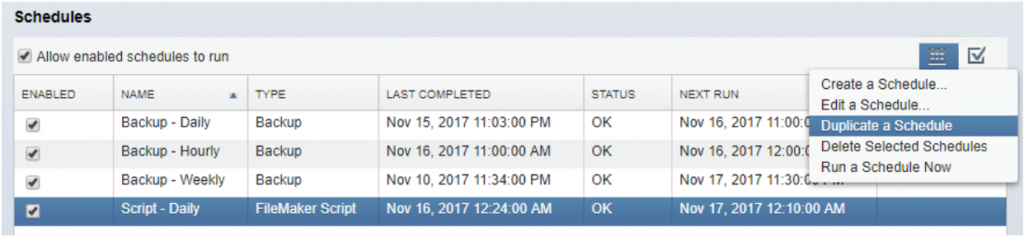
- Duplicate the Daily Script
Select ‘Script – Daily’ from the Schedules on the Admin Console and duplicate it.
3. Edit the Duplicated Script
Select the duplicate and edit it.
On the Database step, leave the settings as they are. Click ‘Next.’
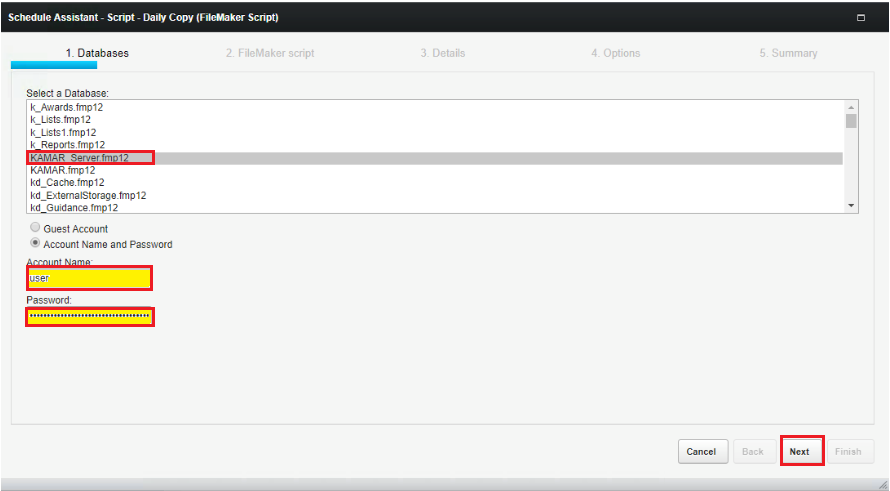
4. Set the Script Parameter
On the FileMaker Script step:
- Select Custom_Script (List#) from the list of scripts.
- Add details in the Script parameter field:
The number of Custom Lists file that you uploaded.
Script name in “Server Scripts”. Don’t put the quotes in… see screenshot below.
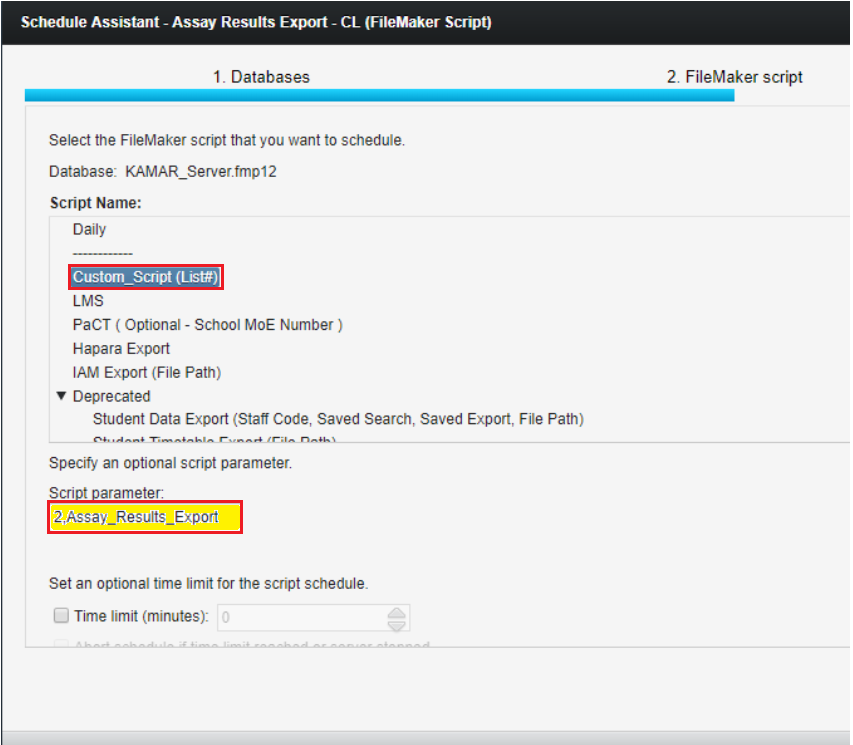
Click ‘Next.’
On the Details step, we want it to run daily, and to run at 5:10 am so that it isn’t going to interfere with any other schedules on the Admin Console (ie, the Daily Script). All Schedules (Core, Results, ESOL, Assessment Schedule) should be scheduled at least 10mins apart.
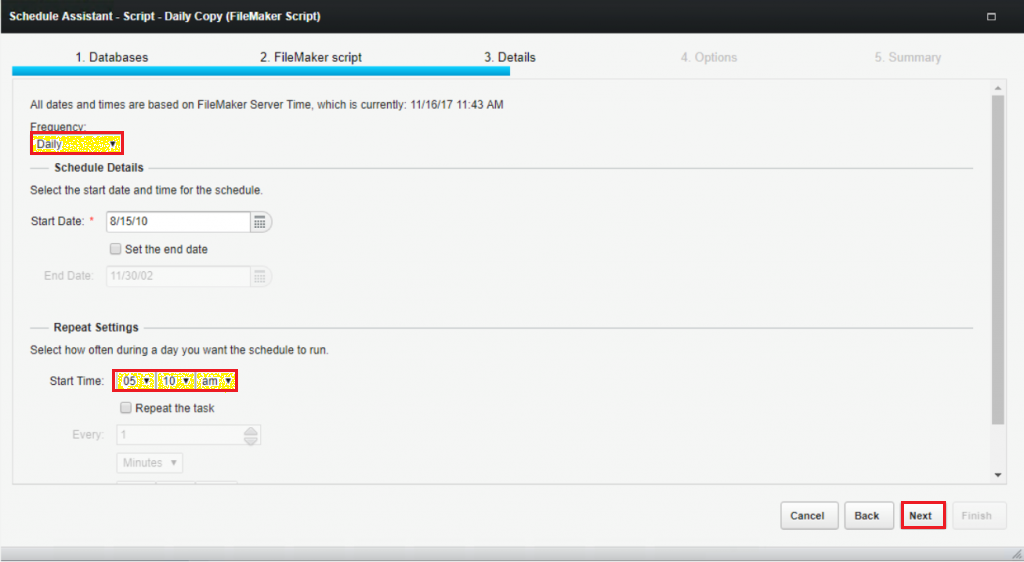
Click ‘Next.’
On the Options step, rename Schedule “Assay Results Export-CL”
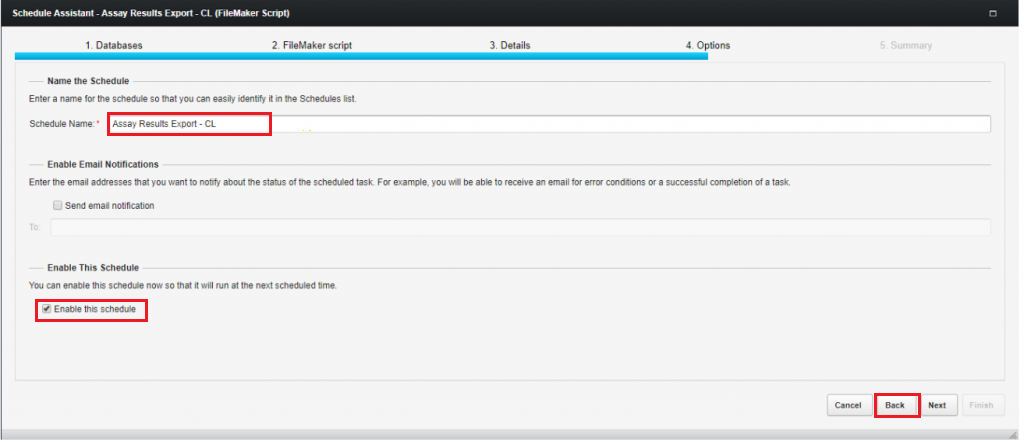
Click ‘Next,’ and check the summarised information for obvious mistakes.
Click ‘Finish’ to complete the process.

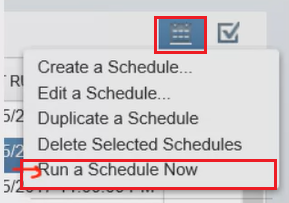
Run the “Assay Results Export – CL” schedule to export data
Login to Assay, go to Admin > Check Upload / Proces > Check Last Result Upload date & time (latest)
Step 6: Disabling Old Scripts / Powershell Scripts
For Windows server with the old Results auto-upload set-up, you will then want to disable/delete the old Filemaker and Powershell scripts that you had for these files.
If there are issues with Core auto-uploads, see instruction links below:
Windows Server: https://www.assay.co.nz/knowledgebase/auto-upload-scripts-update/
Windows (optional, if the previous set-up doesn’t work) and Other Environments: https://www.assay.co.nz/knowledgebase/core-auto-uploads/