
File Maker 17 Results Schedule
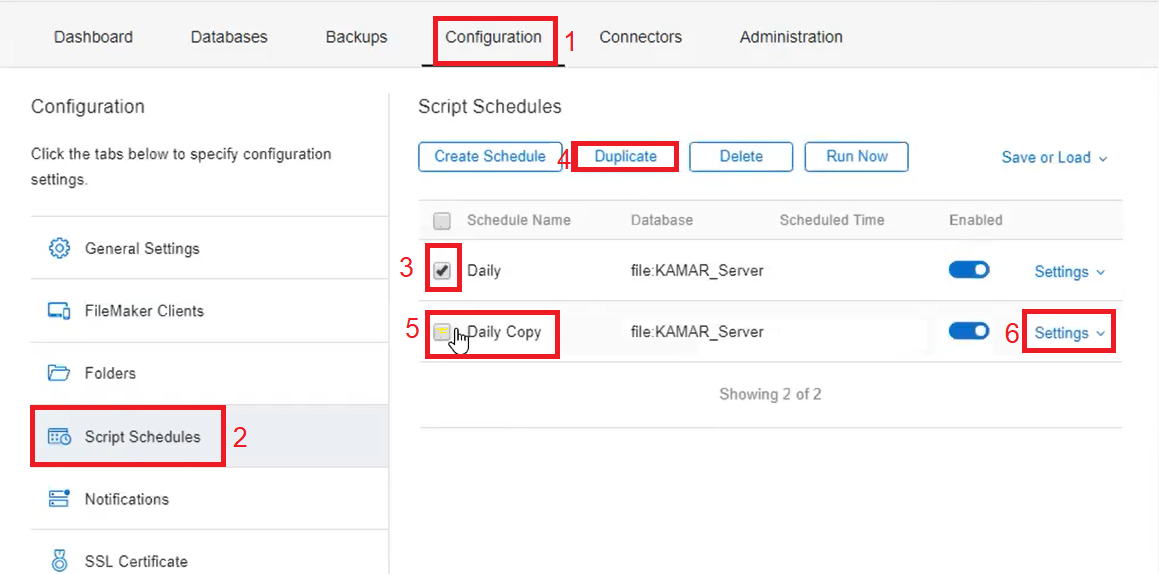
Step1. Login to FileMaker Console
- Create a duplicate schedule, see steps 1-4 below
- Step 5, tick Daily Copy
- Step 6, click Settings to edit Schedule
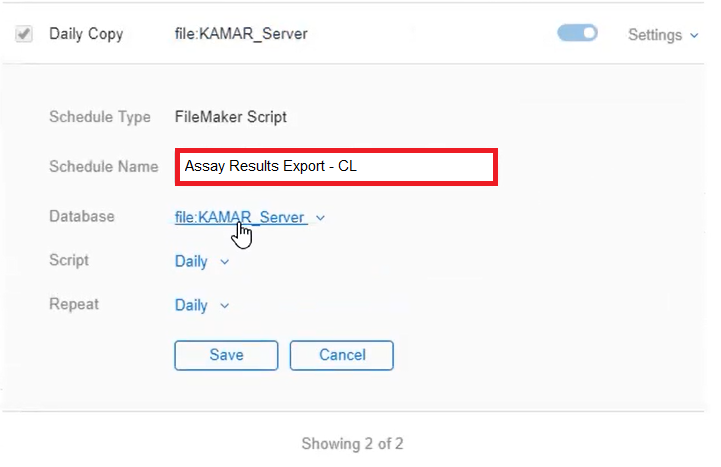
Step 2. Edit Schedule Name:
Set Schedule name to Assay Results Export – CL
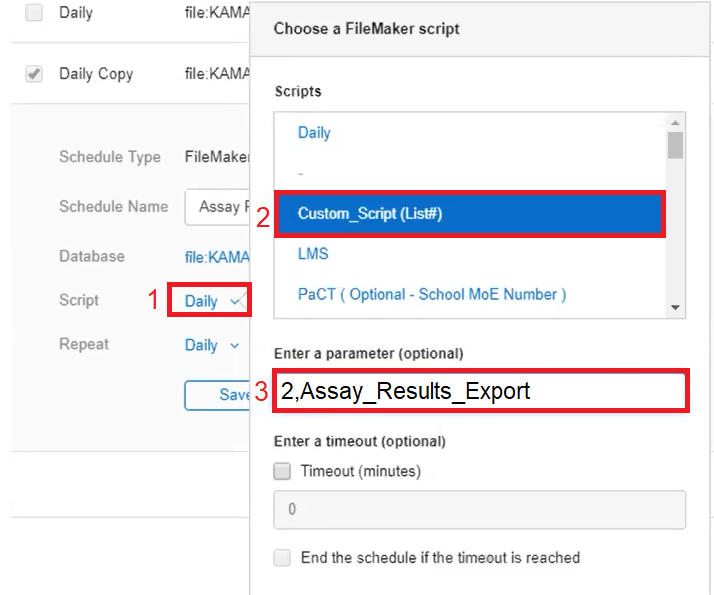
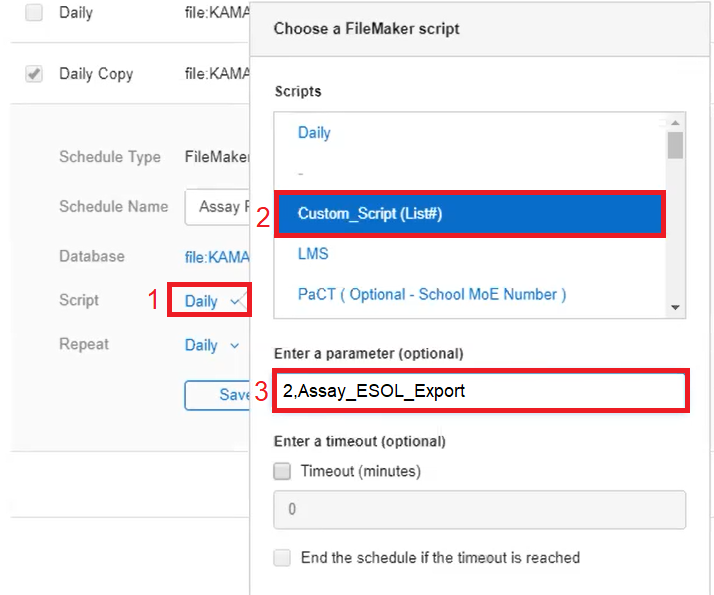
Step 3. Edit Script:
- Click Daily
- Select Custom_Script (List#)
- Enter parameter
The number of Custom Lists file that you uploaded. 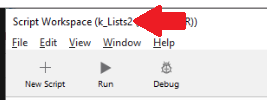
Script name in “Server Scripts”. 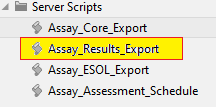
If you use the ESOL schedule, need to duplicate a new schedule and these need to be edited in the same way. (Need to do Step 1 & 2 first) There should be a time interval between the other schedules. Set this 10mins apart from the other schedules.
If you use the Assessment schedule, need to duplicate a new schedule and these need to be edited in the same way. (Need to do Step 1 & 2 first). There should be a time interval between the other schedules. Set this 10mins apart from the other schedules.

Step 4. Edit Schedule:
- Click Daily
- Set Frequency to Daily
- Set Time to 05:10 am so that it isn’t going to interfere with any other schedules on the Admin Console (ie, the Daily Script).

Step 5. Save the Assay Results Export – CL Schedule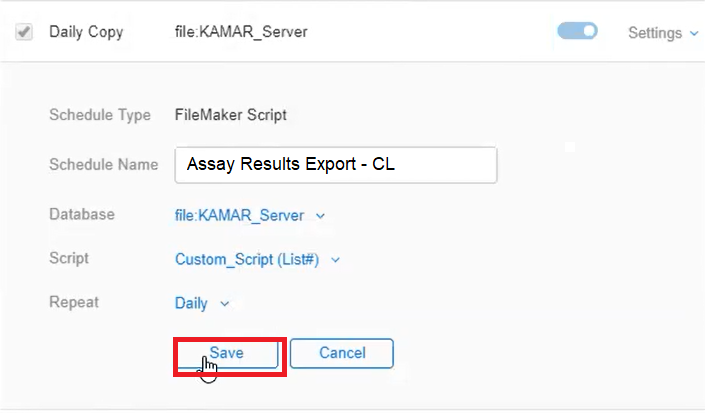 –
–
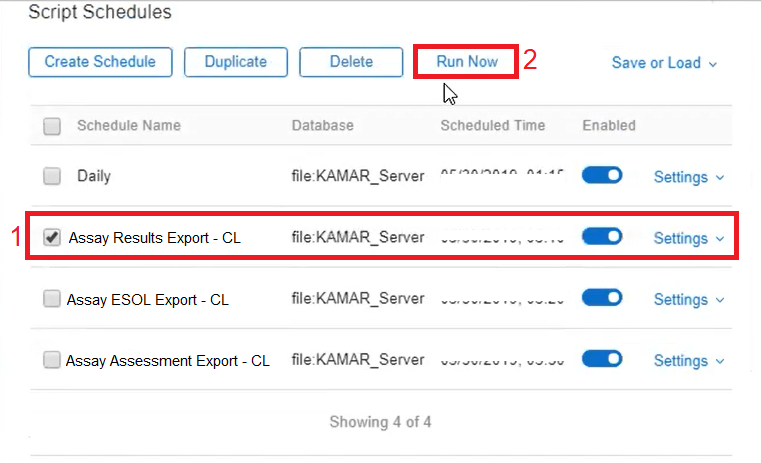
Step 6. Run the Schedule(s)
- Tick schedule
- Press Run Now and wait until completed
Back to Results auto-upload set-up step 5 – 6