
Assay Sync Setup
Step 1: Directory Services setup
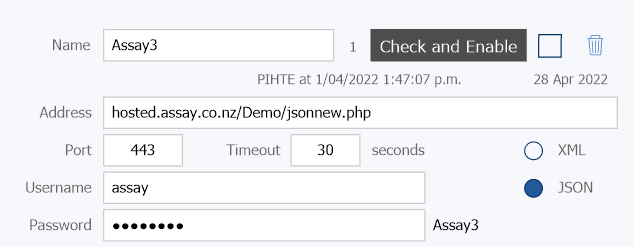
- Name: Assay3
- Address: hosted.assay.co.nz/{Your school URL ID}/jsonnew.php – Your schools URL ID will be sent to you upon signing up for Assay.
- Port: 443
- Timeout: 30
- Username: assay
- Password: Assay authentication. This will also be sent to you upon signing up for Assay, it can also be found by logging in to Assay > Admin > Config > copy authentication
- Select JSON
Click Check and Enable to continue, you should see a success message if the connection is established.
If you do not get a success message, please make sure you have entered the correct URL ID, and the authentication code you have entered has no white spaces surrounding it.
The rest of the options will now be available to you.
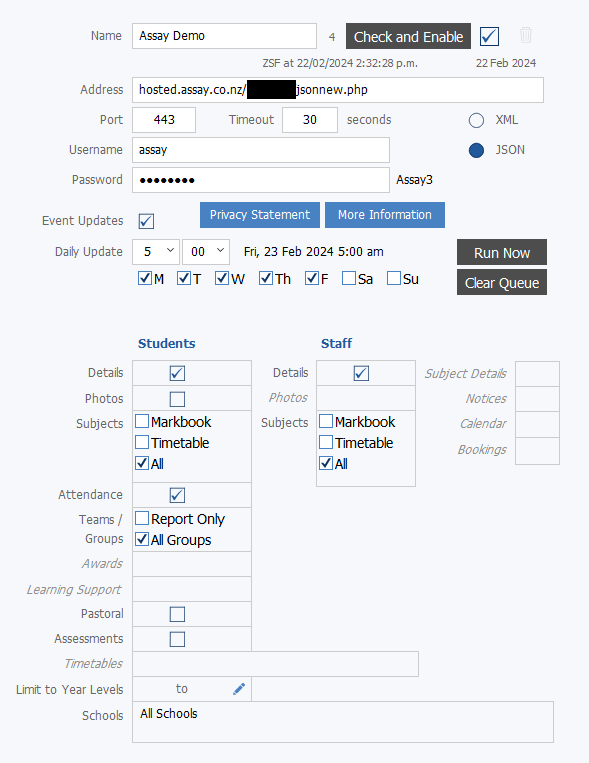
- Event Updates – check
- Daily Update – set the time to any time between 3am and 5am, then tick Monday to Friday
Student Details
- Click on the Details checkbox in the Students section and a list of student details will appear. Make sure all options are checked, and click anywhere on the screen to close this box
- Photos – check if you want to see Student Photos in Assay
- Subjects – Check All
- Attendance – click on the Attendance checkbox to display the options. Check Include Attendance and Send Whole Year in Next Sync
- Teams/Groups – Check All Groups
- Pastoral – Leave unchecked
- Assessments – Leave unchecked
Staff Detail
- Click on the Details checkbox in the Staff section and a list of staff details will appear. Make sure all options are checked, and click anywhere on the screen to close this box
- Subjects – Check All
Your setup should look like this:
If your school has a large number of students (1000+), or it is late in the year, you will want to hold off on the next step until after of school hours as sending large amounts of attendance data can put a strain on your KAMAR server.
Click Run Now to start at sync, this can take some time to run.
Step 2: Custom File Setup
Download the new Custom File Here.
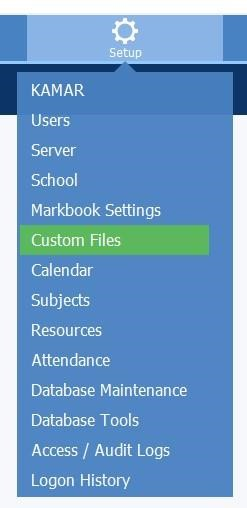
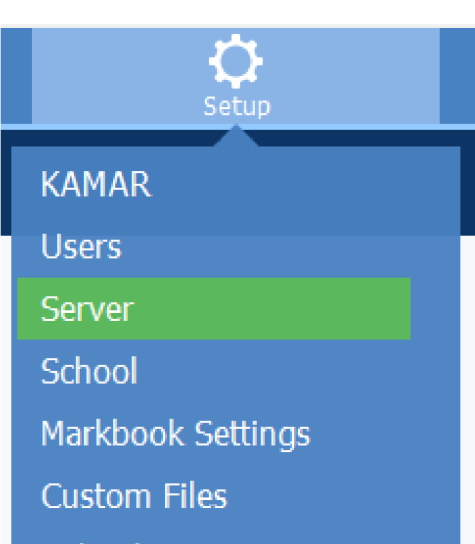
Now go Setup > Custom Files
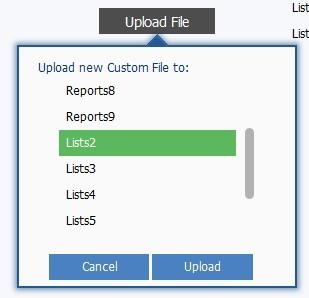
Click the Upload button and select a List to upload the Custom File to and click Upload, which will prompt you to upload the Custom File you can download above.
You will need to remember which List you uploaded the file to for later.
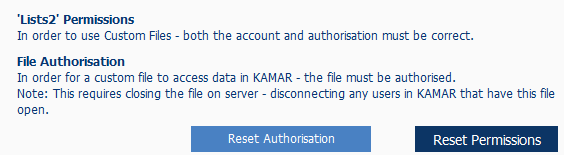
Then, with the List you uploaded the file to Selected Press the “Permissions” button and press the “Reset Authorisation” button.
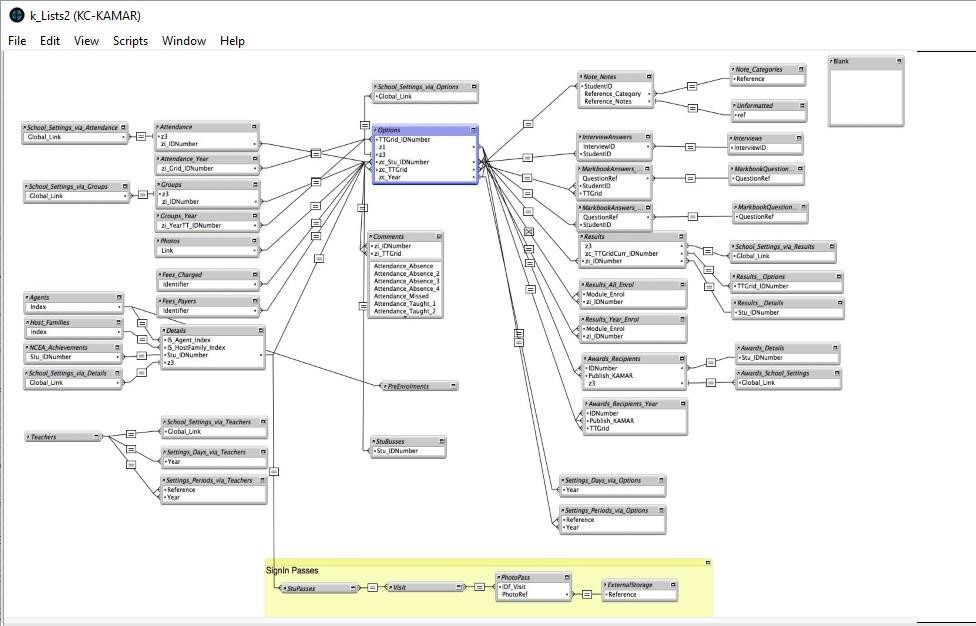
Then press the “Open File” button. This will bring up a screen that looks like this:
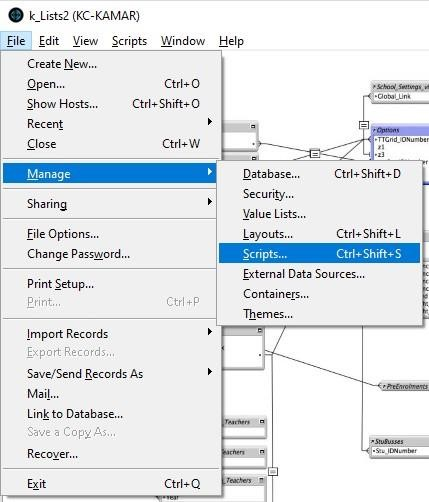
Click on File in the top left, then go Manage > Scripts…
This will bring up a screen that looks like the one below. Double click on the option ‘Action_ServerScript’ located on the left side menu.
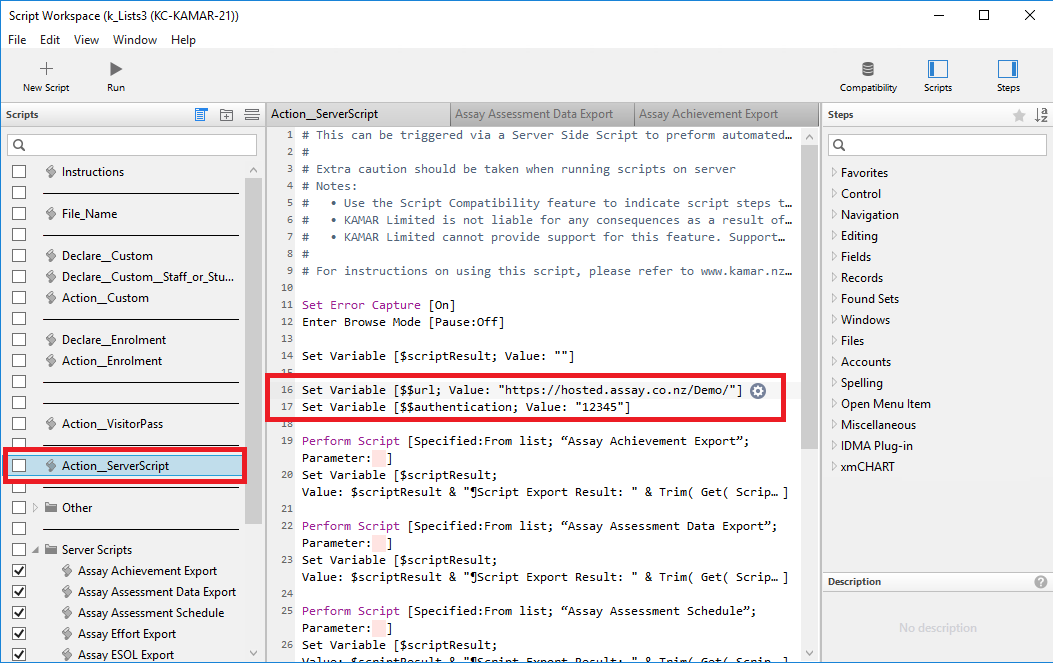
The variables on lines 16 and 17 outlined above need to be changed for the data to get sent to your Assay.
Double click on line 16 to open this window:
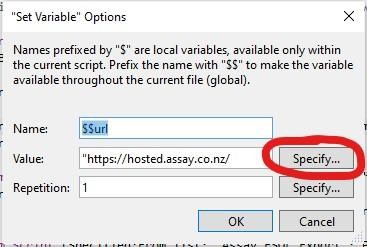
Click the Specify button to open this window:
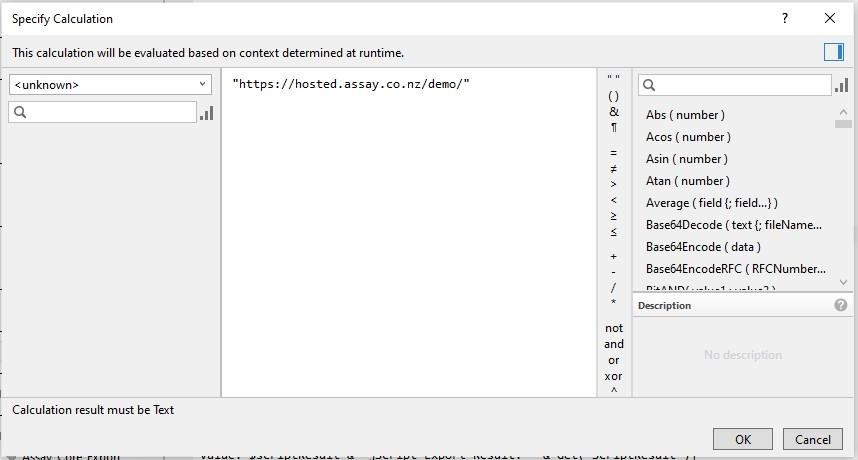
Inside this window, replace “demo” with your schools Assay URL. Make sure to keep the quotes where they are. Click OK to close the window.
Repeat the process for line 17, but replacing 12345 with the authentication code used when creating your Directory Services connection to Assay. Again making sure to not remove the quotes.
The authentication code will have been sent to you upon signing up for Assay, it can also be found by logging in to Assay > Admin > Config > copy authentication
Make sure to save before moving on, either by going File > Save or by pressing Ctrl + S.
You can now close the Scripts window and navigate to Setup > Server Maintenance Scripts > Custom to create the schedule that will run this script.
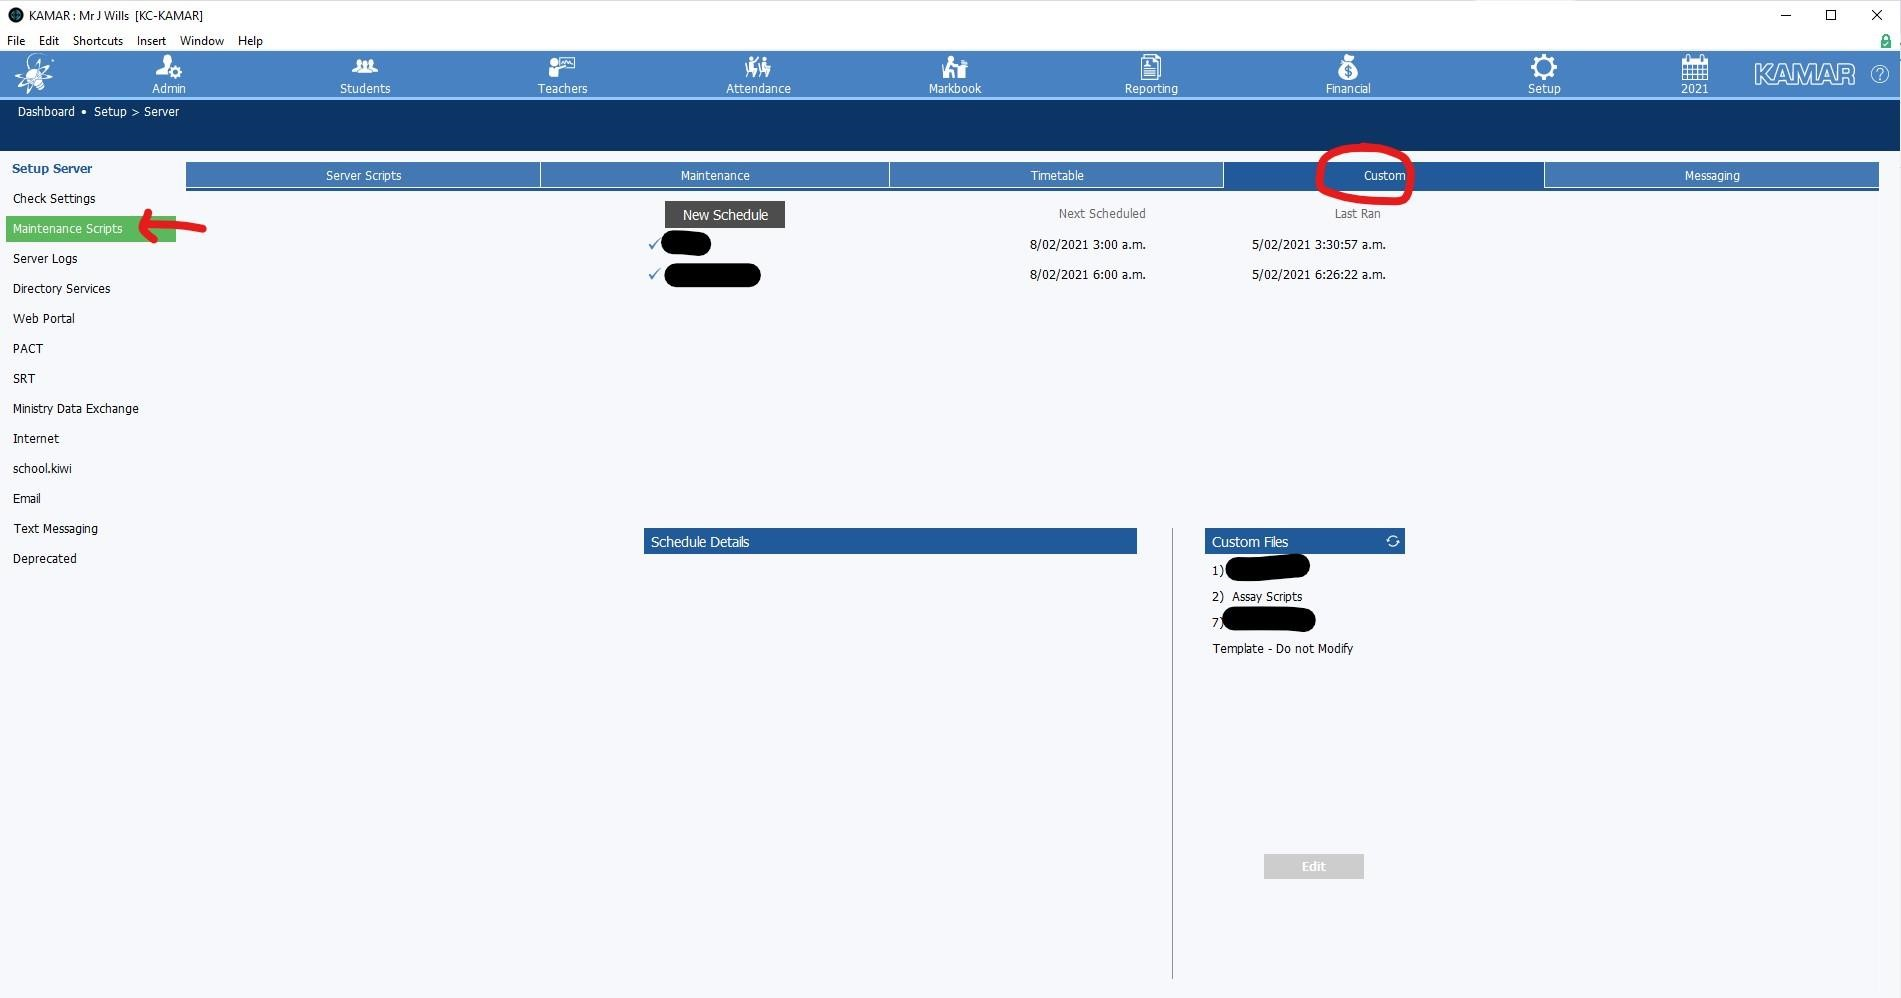
Click New Schedule:
- Name: Assay
- Custom File: check the box that matches the number List you uploaded the Custom File to
- Enabled: Check
- Schedule Time: set a time between 3am and 5am.
- Schedule Days: check Monday to Friday
- Load Timetable Grid: Check
The example below is a setup where the Custom File was uploaded to List 2
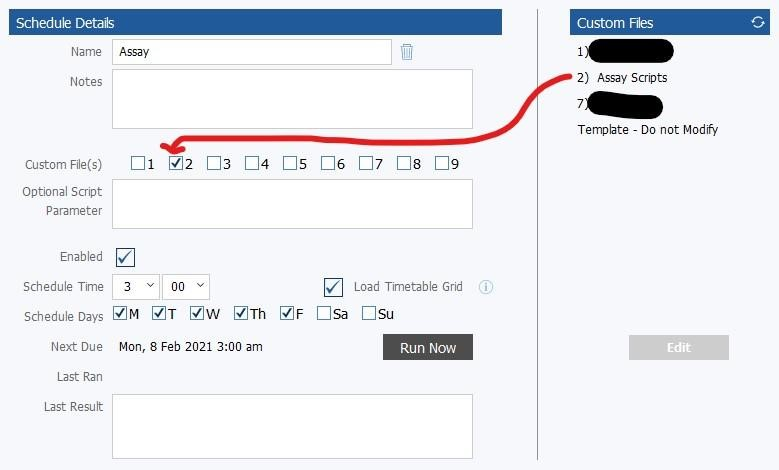
Click Run Now to start the sync. The data that gets sent to Assay will be saved overnight.