Assay Auto-Uploads (KAMAR version 17+)
Step 1: Remove the old Assay scripts
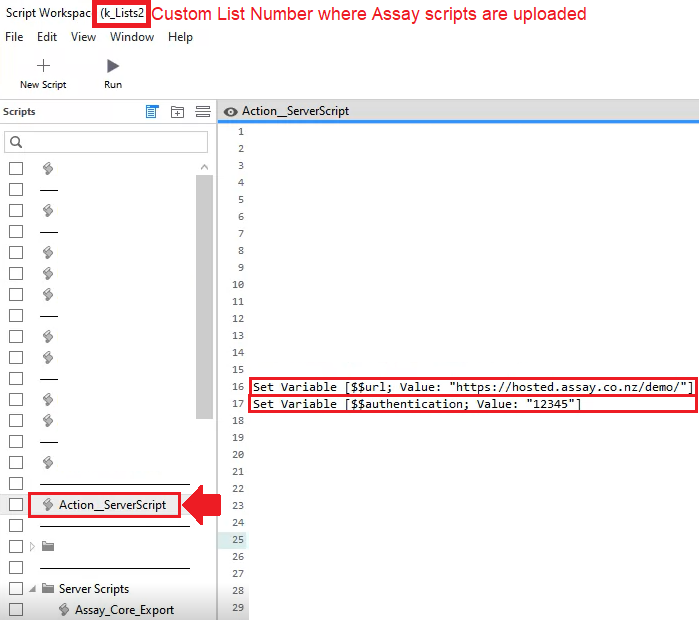
Check first if the school is using the correct Assay script. Go to KAMAR > Main Menu > Printing > Custom > select Assay Scripts > tick Edit Custom File > Edit > a new window/screen will open. On the left pane > select Action_ServerScript
Check first if the school is using the correct Assay script. Go to KAMAR > Main Menu > Printing > Custom > select Assay Scripts > tick Edit Custom File > Edit > a new window/screen will open. On the left pane > select Action_ServerScript
* If lines 16 and 17 exists, proceed to step 3
* If lines 16 and 17 do not exists, go to Main Menu > Printing > Progress Reports > Global tab > Custom Files tab > Select the Custom List number where the old Assay script was uploaded > Remove File. To check the Custom List number, go to Main Menu> Printing > Custom > Assay Scripts > tick Edit Custom File > Edit > a new window/screen will open > check the Title bar (see screenshot below)
* If lines 16 and 17 do not exists, go to Main Menu > Printing > Progress Reports > Global tab > Custom Files tab > Select the Custom List number where the old Assay script was uploaded > Remove File. To check the Custom List number, go to Main Menu> Printing > Custom > Assay Scripts > tick Edit Custom File > Edit > a new window/screen will open > check the Title bar (see screenshot below)

Step 2: Upload new Assay scripts
Go to Main Menu > Printing > Progress Reports > Global tab> Custom Files tab > Click upload file and upload this file: Download k_Lists2.fmp12
Go to Main Menu > Printing > Progress Reports > Global tab> Custom Files tab > Click upload file and upload this file: Download k_Lists2.fmp12
Note: The list numbers vary from each school set-up. In the example below, it shows Lists2 (Custom Lists 2) is available > select Lists2 > Upload k_Lists2.fmp12
Step 3: Edit Assay scripts
Go to Main Menu> Printing > Custom > Assay Scripts > tick Edit Custom File > Edit > a new window/screen will open
Go to Main Menu> Printing > Custom > Assay Scripts > tick Edit Custom File > Edit > a new window/screen will open
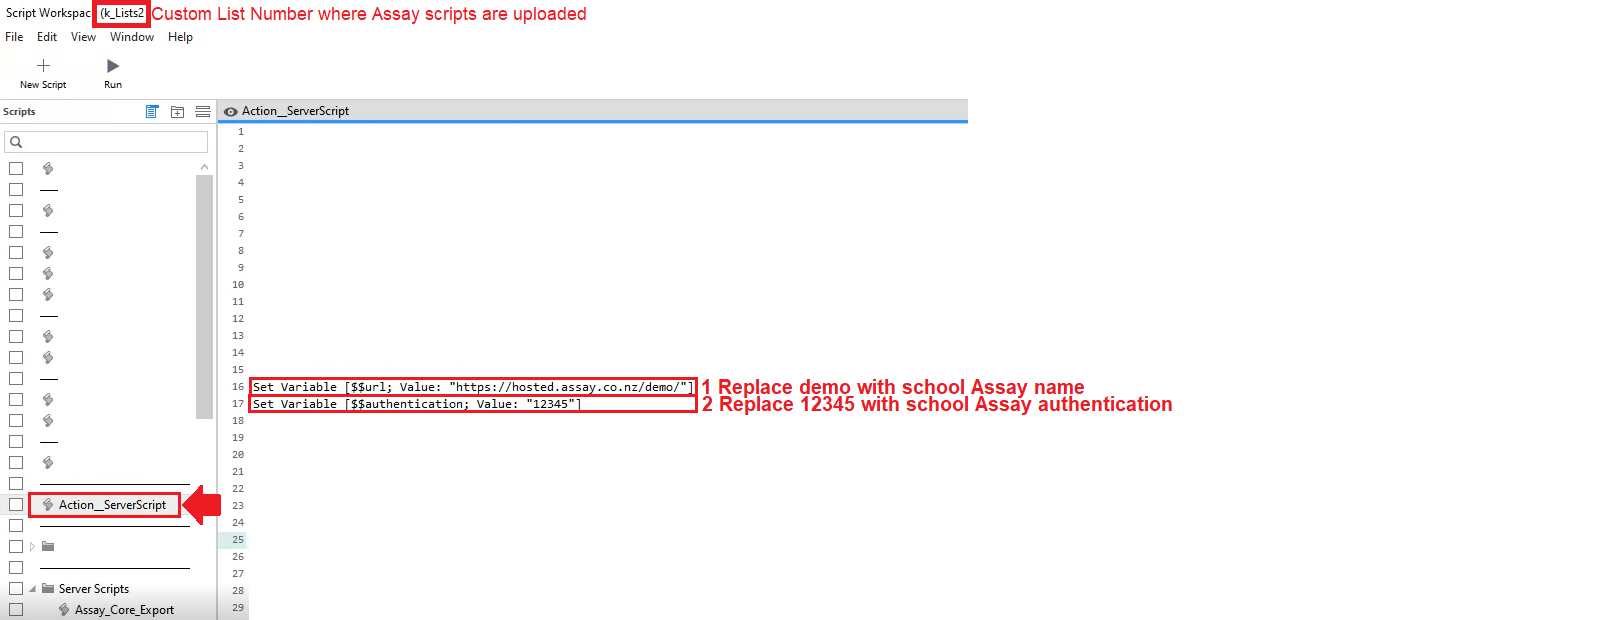
Edit lines 16 and 17.
To get the school authentication, login to Assay > go to Admin > Config > copy the authentication.
Save All changes.
Step 4: Automating Core Script
For File Maker version 17+, follow instructions here
KAMAR has provided instructions on how to run these custom scripts here: https://www.kamar.nz/105744
1. Log onto the Admin Console on KAMAR server.
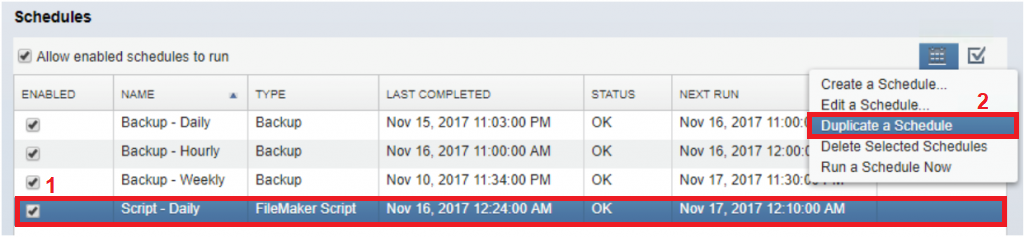
2. Duplicate the Daily Script
Select ‘Script – Daily’ from the Schedules on the Admin Console and duplicate it.


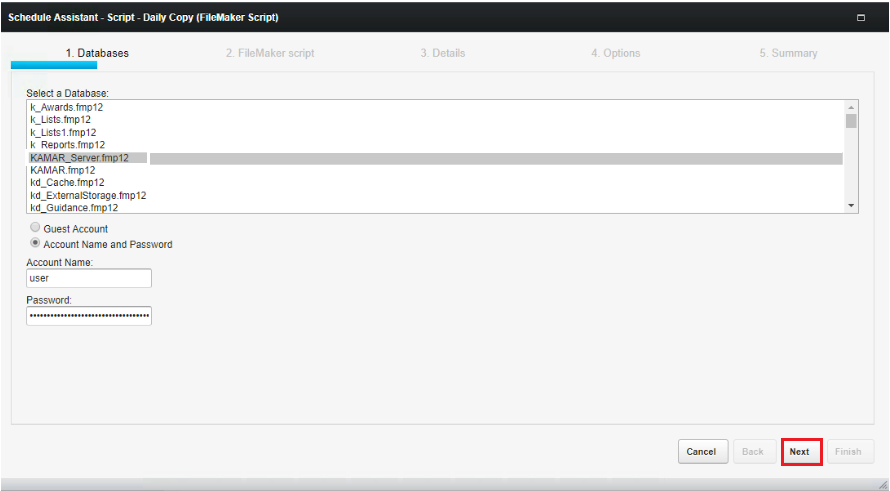
3. Edit the created duplicate schedule. Select “Script-Daily Copy” > click the calendar icon > select “Edit a Schedule”. On Database tab, click Next.

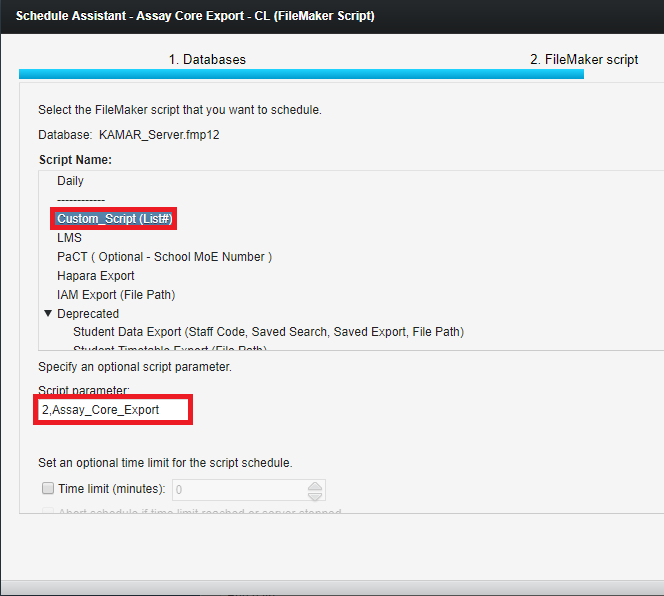
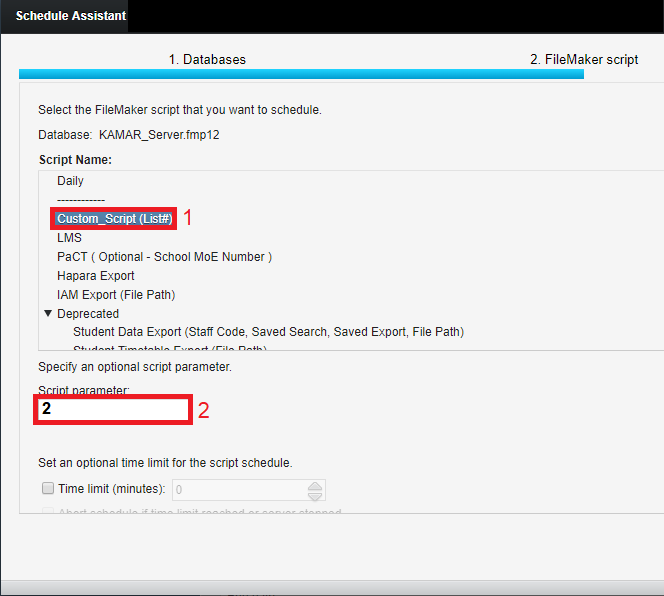
4. On FileMaker script tab, select “Custom_Script (List#)” > input “2, Assay_Core_Export” . The “2” is the Custom List number where Assay k_List is uploaded, if unsure, please check step 2. Then, click Next.
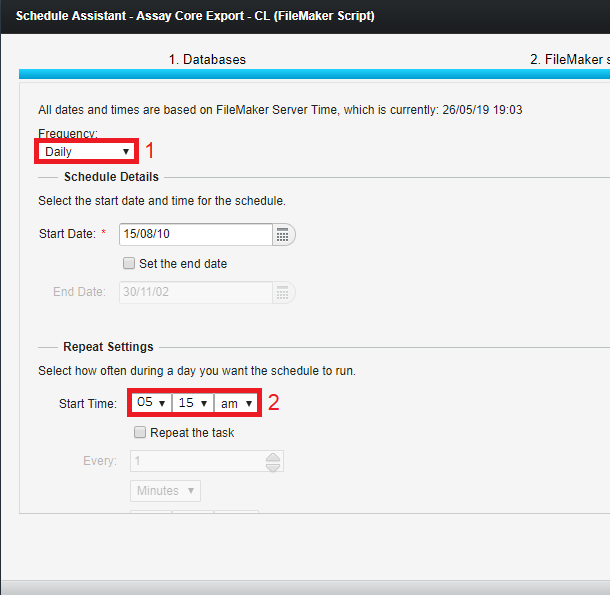
5. On Details tab, we want it to run Daily, and to run at 5:00 am so that it isn’t going to interfere with any other schedules on the Admin Console (ie: the Daily Script). Then, click Next.

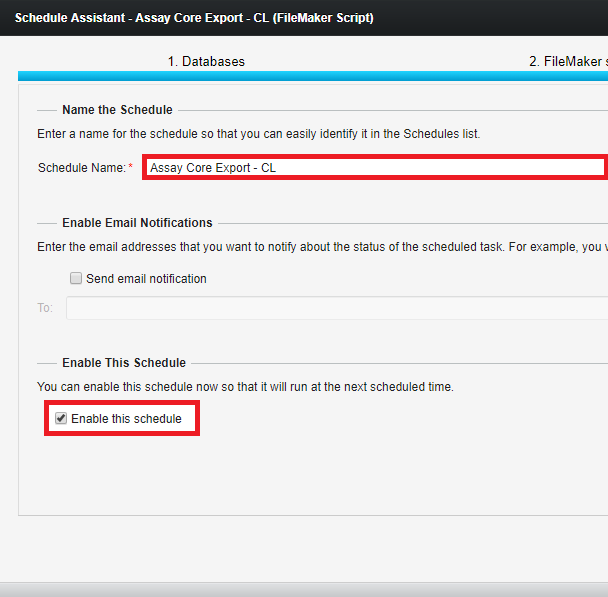
6. On Options tab, set the schedule name to “Assay Core Export – CL” > tick Enable this Schedule > Next/Save/Finish to complete the process.
7. See the final Setup, then Run the schedule, select “Assay Core Export – CL” > click the calendar icon > click “”Run a Schedule Now”

Step 5: Automating Result Script
For File Maker version 17+, follow instructions here
1. Log onto the Admin Console.
2. Duplicate the Daily Script
Select “Script – Daily” from the Schedules > click the calendar icon > select “Duplicate a Schedule”.
3. Edit the created duplicate schedule. Select “Script-Daily Copy” > click the calendar icon > select “Edit a Schedule”. On Database tab, click Next.
4. On FileMaker script tab, select “Custom_Script (List#)” > input “2” – this is the Custom List number where Assay k_List is uploaded, if unsure, please check step 1. Then, click Next.
5. On Details tab, we want it to run Daily, and to run at 5:15 am so that it isn’t going to interfere with any other schedules on the Admin Console (ie: the Daily Script). Then, click Next.
6. On Options tab, set the schedule name to “Assay Results Export – CL” > tick Enable this Schedule > Save/Finish

7. See the final Setup, then Run the schedule, select “Assay Results Export – CL” > click the calendar icon > click “”Run a Schedule Now”

Step 6: Login to Assay
1. go to Admin > Check Upload / Process > Check Last Core Upload and Last Results Upload datetime (should be current date and latest upload time)
2. Process data, go to Upload Data > Select year > Process button (bottom page)